Allow or Deny Access To Your Videos Based on IPs
Protect your video players and apps from unauthorized IPsIP Access Restrictions
This is a great feature for corporate users or anyone that simply wants to restrict the video access based on IPs. As you know all the users within an organisation have the same IP extrenal address. This option will block the access for viewers outside of your organisation.
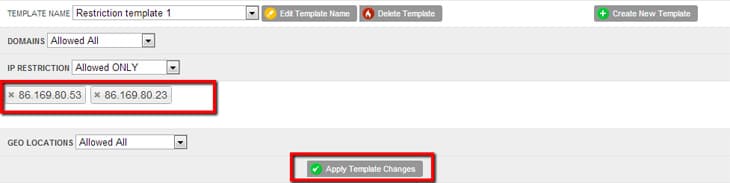
You can choose "Allowed Only" and enter one or multiple IP addresses. By entering an IP address, only connections which originate from the specified IP address will be able to view the video.
IP RESTRICTION OPTIONS:
Allowed All – Your video is allowed to be viewed from any IP address.
Allowed Only - Only your selected IP addresses will be allowed.
Allow All Except – All IP addresses except the entered IP’s will be able to view your video.
Getting Started
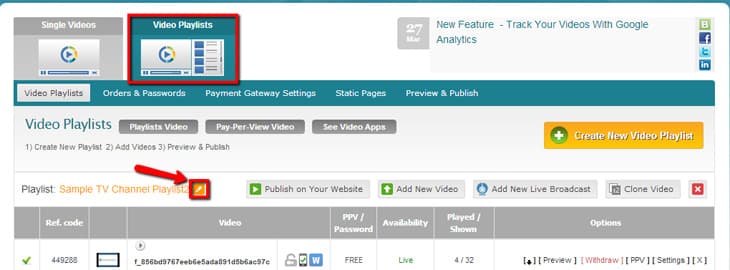
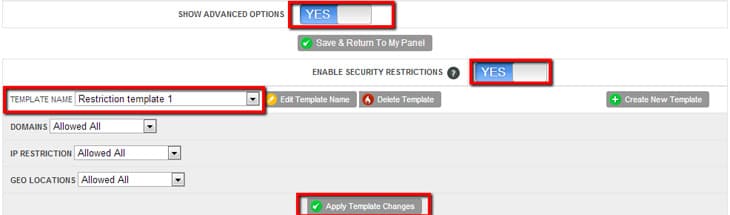
To enable domain restrictions and create a Rule Template, which can be applied to other Videos and Playlists simply click on the "Settings" Button located next to the video or Playlist name, scroll down and "Enable Security Restrictions".
Once enabled, you need to Create a Security Rule Template give it a name such as "My Restrictions" and click on the "Save Button".

Now click on the IP Restriction choice list and choose your preferred restriction setting such as "Allowed Only". Enter your IP addresses and hit the "Return Key" on your keyboard to confirm the IP address entry. When you have entered all the desired IP Addresses in your list click on the "Apply Template Changes" button to save your changes in the rule template and now click on the "Save Changes" button to confirm and apply the changes to your video or playlist.

Applying Created Restriction Rules to other Videos and Playlists
Now that you have created a restriction rule you can easily apply the rule to other videos or Playlists by clicking on the "Settings" button under video options or Video Playlists name.
Then "Enable Security Settings" (You may need to enable "Advanced Options" in the Playlist settings section to see the "Enable Security Settings" button.)
- Now simply choose the previously created Rule template from the drop down list and click on the "Save Changes" button to apply your rule.
Frequently Asked Questions
What's the benefit of applying IP blocking / filtering restrictions on my videos?
- For example you may want to secure your videos and allow only your office to have access to your videos so you can lock all them all to your external IP address. This is great if you are creating corporate training videos or videos that need to be kept internally.